rc edits official

Sunday, April 10, 2022

Soft Zooming Transition Tutorial

April 10, 2022 0

 Trending Soft Zooming Transition Tutorial 


Introduction:

Today i'm going to show you how to zoom in Alight Motion, also you will see how you can create different zoom effects on your footage so when zooming into our footage it all comes down to using the scale parameter here in your effects controls.

    So you can use the scale parameter to zoom in zoom out your clip you can also use your position parameter, your x value to move your clip left and right and your y value to move your clip up and down and you can reset any of these parameters, by hitting this arrow here and reset it back to the default values now one of the easiest ways to zoom in on a clip is to use what they call a punch cut or cut to close up and for this type of a zoom you don't need any key framing i have a clip here in the timeline.


Position:

 i'm just going to move my playhead over, i'm going to make two cuts here on this clip hit c for the razor tool make one cut right there bring my head over and this is where i want my punch cut to end so i'll make another cut right here hit my v key to go back to my selection tool and then i'm going to select that middle clip 


Add Keyframes:

i'm going to adjust my scale parameter and zoom in and i'm going to change my x and y values kind of center this and so as i play this back here is my zoom in or my punch, cut and now it's going to go back to the wide view and that's the easiest way to zoom if you don't want to use any keyframing, so now with this clip here we're going to zoom and we're going to use keyframes to enable keyframing come up to your effects controls, and if you're going to use position and scale together or one or the other you would click on the stopwatch right here and right away it creates default keyframes and if you move your playhead over.

  let's say i want to scale this up and when i made a change to the scale at the position of my playhead it made another keyframe and if i play this back you can see it zoomed and the distance between the initial keyframes, and the last one is the amount of time it takes for your clip to zoom in and if you need to move your keyframes at the same time just highlight them and they both turn blue and you can move them back and forth to change your starting position or your ending position or your keyframing, now to help with a smoother zoom you can highlight in this case the first keyframes and right click and come down here to temporal interpolation and say ease out and you notice that your keyframes change shape.

   i'm going to do this to my second keyframe and right click and say ease in so what we're doing here is we're actually creating a bit of acceleration, into the motion rather than to just abruptly starting and stopping so this should make it a little bit smoother looking played that back next to position,and scale if you drop down this arrow you see that your key frames have a graphical representation, and so you can grab these handles and these will give you more control over your zoom so if you want to zoom out it's basically the reverse so if i have my clip selected here and i'm going to click on scale and position to make my default keyframes.


Add Effects:

we're going to have a zoom and it's going to zoom in in the middle of two clips and it's going to have some motion blur, first you're going to come down here to the bottom of the project panel and click on this icon that's where it says new item and add adjustment layer and so i'm making sure that it is the same as my sequence and then drag that adjustment layer, over my clips that's the way it looks and put my playhead right in between the two clips and i'm going to select that adjustment layer and go into my effects and search for transform effect and i'm going to drop that on my adjustment layer.


Angle:

      i'm going to make a couple of adjustments and come down here to my transform effect, and scroll down and uncheck to use composition shutter angle,  and change that shutter angle to 360 this is going to create our motion blur in the transition now without moving the playhead i'm coming over to scale and i'm going to change the value to 300 and use my left arrow key and move my playhead back, three frames and i'm going to change my scale to 100 and so that created another keyframe there and i'm going to hit this arrow here that says go to next keyframe that's the first keyframe and then


Ending:

 i'm going to use my right arrow key and move over one frame and then click add remove keyframe, i have a new keyframe there and then i'm going to use my right arrow key to go over five frames and then here's where i'm going to change the scale back to 100 and if you want you can change the position, of these keyframes to change your timing but here's the motion blur in our transition you want more tutorials like this click or tap on one of the videos on the screen now and remember, it's never too late to learn thanks for watching see you in the next video you 


Read More

Tuesday, April 5, 2022

Advanced Transition Tutorial

April 05, 2022 0


what's going on youtube Rc with venture visuals and on this channel we break down trendy music video effects and creative editing skills and today i could not be more stoked to be showing you guys this film roll transition that's very easy to create in alight motion pro but before we get started i just want to shout out you guys out there in the audience who are watching my tutorials and leaving comments liking the videos all that the channel just hit a thousand subscribers this week which i am stoked about and you guys helped me get there so the first thing.


 we're gonna do is basically just identify where we want the transition to start so this is where i think a good spot for this transition, is gonna be so as you can see we already got the two clips split in half like that what i'm gonna do is hold shift on my keyboard go to the left and that's gonna bounce over five frames here on the left

 i'm gonna make a cut right there and now i'm gonna hit shift and go to the right twice that's gonna go to the right ten frames and i'm gonna make a cut highlight them right click on them and nest them so they are just one clip here on the timeline so what we need to do first is add in an effect called offset so that's over here in our project panel we're just going to type in offset and you'll see it under the distort folder we're going to drag that onto our nested sequence like so you're not going to see anything happening here in the beginning, and that's fine we're going to make a keyframe under shift center too i'm going to drag that keyframe to the beginning so now what we're going to do is scroll to the right here on our nested sequence adjust this shift center two.


    we're gonna drag this value of 540 and we're gonna just play around with this let's go maybe to like 5000 okay so it'll be a pretty quick transition here so check this out so you can see it right there maybe that's a little bit too fast so let's take this value let's go down to like three thousand that's probably going to look a little bit better so now when i play it back we'll get this so that looks a lot better than how fast i had it going before step two for us is gonna be to add an effect called fast blur.


   so we're gonna go to our effects panel and we're just gonna look up bass blur under obsolete we're gonna drag that onto our nested sequence as well and we're just gonna turn this blurriness up to about 115 right so it gets blurry like that but we don't want it to be blurry on the horizontal, and vertical the blur should just be horizontal okay so we kind of get that look step three is gonna be to add a circle okay so we're gonna type in circle and we're gonna click and drag that onto our nested sequence so now with this circle up in our effect controls we're going to change the radius to like 700 right so we get a very very large circle here.


   we're going to go ahead and like keyframe the center and the radius points for this circle just going to keyframe, and move this point around a little bit maybe we'll have it like kind of bleed in to the frame a little bit like that and then maybe uh the radius gets a little smaller you know right around the middle and then we'll go kind of like we'll get big again and then you know we'll drag the position down a little bit here from the center and you know it's making these keyframe, points now when we scroll over the nested sequence you can see how that circle is moving right but like what is this circle for okay so i'm going to explain this to you guys this is kind of an interesting way to make light leaks or film burns in alight motion so what i'm going to do is change the color and i'm going to make it uh somewhat of an orange color you know something like, that looks good and then what we're going to do is we're going to feather this outer edge a ton we start to get this you know really feathered edge here with our orange circle i'm actually going to turn it up a little bit more 

 so we're going to bring this up to even you know let's go to like 950 okay perfect now we got this really nice soft edge come down under opacity and change the blending mode to add and now we can see our clip behind it so now when i scroll over we get that film burn type of look that just kind of comes into frame as the transition, starts step four is going to be to duplicate this light leak that we just made i'm just going to click on our circle here in our effect controls i'm going to hit command c command v right so that's going to make another circle and as you can see our light leak gets a little bit brighter which is awesome i'm just going to change the second circle and i'm going to change the color to something a little more red okay so you know we get more of an authentic fiery type of look now what i'm gonna do is just change the center and radius key points the keyframes so that it looks it's a little bit offset from the first light leak that we created right 

so i'm going to drag it maybe over here to the right side and then you know here in the middle we can you know maybe have it stay on the right side go down a little bit so it's kind of in the opposite corner of the orange and then here at the end you know it's fine if it kind of goes across the screen a little bit maybe a little bit less maybe just to like the middle part okay so yeah now i keyframed,that second film burn that second circle a little bit differently so we have it you know on the other side of the frame it doesn't look identical to our first film burn and that just helps give it that more authentic look and feel the effect is pretty much done all we need to do is add in a little bit noise give it some texture we're going to come over here to our effects tab type in noise and we're going to find it under noise and grain right here we're just going to throw that onto our nested sequence as i increase it you can see this is like very very high percentage here 100 noise we don't want that we just want something a little bit more textured than just like your your normal clip right so we just want to add a little bit of texture in there so i'm going to hover around 10 percent on this noise you know you can see these little noise particles here over the frame so that just helps give it some texture makes it look a little more authentic so i'm just going to hit i on my keyboard, to mark the in point and i'm going to hit o on my keyboard to mark the out point i'm going to come up here to sequence and i'm going to hit render into out this is going to pre-render what we have so far so now you can see this green bar here on top means this sequence is fully rendered out to maximum quality it's not going to lag at all so now when we watch it back check it out [Music] yeah so pretty cool one thing i would change is just how this transition starts and i would actually easy ease out this first offset keyframe so i'm going to right click on that keyframe hit temporal interpolation, go to ease out right there and so now it's going to ease out of the original frame a little bit smoother instead of just going straight into the transition

 it's going to kind of like ramp into the transition okay so that's going to make it look a little bit smoother as well and now i've rendered it so that it's full speed so let's watch it one more time here  yeah so that went a little bit better with the beat right there especially because the kick drum is kind of like offbeat so i do have a few clips here from another music video so we're just going to go through this pretty quickly so i'm going to start at this uh cut right here that hits right on this kick drum i believe or this base yeah so it's like the it's like the drop of this song right there okay so i'm going to go to that cut i'm gonna hold shift go to the left five frames go to the right ten frames i'm gonna cut where both those clips are right click on them nest them so that they're their own clip what's our first step it's offset right so we're just gonna go offset throw that on there keyframe the shift center we'll just throw these numbers around until we're satisfied let's see how fast this offset is we're just going to easy ease out that first keyframe add the circle so we'll throw that circle on there increase our radius let's get really big with this one remember we got to feather it so let's go like a thousand feather and let's change the color to like a red blending mode to add right let's just drag it over here to like the left side a little bit let's keyframe the opacity of this one a little bit let's make it kind of like flicker a little bit on this one right so we're going to keyframe this light leak opacity so when i play it back now check it out it's it's not that noticeable when you watch it in full speed but when i scroll over here frame by frame you can see it flickering that red and now what we're going to do is just throw on that blur so let's just do gaussian blur for this one we'll throw on that gaussian blur and this time let's do vertical let's see what that looks like okay.

so we're going to keyframe, the blurriness starting pretty much right in the middle of that transition so the blurriness has got to be pretty good right away and you know it's going to stay pretty blurry until the motion slows down right so it's going to be pretty blurry so we're going to make a keyframe right there, and then right here at the end it'll get like pretty much back to normal right so now we got like that blur back to normal i actually do like the vertical blur with this gaussian blur maybe even a little bit more than i liked uh the horizontal blur on my first example right so there's the horizontal and there's the vertical the vertical actually goes with the motion more for this specific film role and now what do we need to do we need to add that noise right.

 so we're going to throw in that noise right on top turn this amount of noise up to like you know 20 maybe for this one and now we kind of get that texture that makes it look a little more authentic so pretty cool looking as i scroll over it you know maybe you want to add that other film burn in after all so maybe we'll take that circle hit command c command v change the color you know let's change it to like uh let's change it to the orange again you know let's take the center over to the right side so it's just on the right side maybe drag it up a little bit so it's kind of up in that top right corner [Music] i really like it the one thing i wish was different with this one is that if it ends pretty much on the frame of the very next shot so you can see it kind of ends and the next frame is kind of off-centered uh with the next clip so what we're going to do is just find where that center is so you know right about there you know that looks like it's about centered up so maybe like right there looks good

 so now we got it and then it just kind of stops there at the end and it aligns with the next clip right so that's how you keyframe the offset and kind of get it to look a little smoother now when we watch it back we can see what it looks like in regular motion  awesome, way to kind of make the beat drop slap a little bit harder and if you're a video editor out there who's interested in adding some sauce to your edits definitely check out my website i got a free pack on there where you can try all my products completely for free i got overlays transitions about to add in some overlay textures and some titles for photoshop some cinematic titles i really appreciate you for tuning in thank you so much for watching, this entire video it means the world to me and it helps my channel grow faster so thank you so much for that and until next time guys i'm jake benner peace out you 


Read More

Tuesday, March 29, 2022

Advanced Transition Tutorial

March 29, 2022 0


Advanced Transition Tutorial


what's up everybody Rc here and today we're talking about transitions now this is part three and an ongoing series on stepping up your filmmaking there's a lot to cover.


 so let's go all right guys you've been asking for it so today we embark on the journey that is transitions now there is a lot to cover with this but I'm going to break this video into several different videos over the next couple weeks just because I could easily make this video over like an hour and a half long and some of you guys would be like yeah and some of you would be like stop talking.

 so I'm going to try and find some middle ground here but there's a lot to go over so in today's video we're going to look at only a couple transitions specifically I want to show you guys how to do the the masking in the frame blocking which is where something covers the frame and you mask to a transition underneath you guys have seen this on a couple of videos that I've done I didn't one of my vlogs where that my friends workshop and we were showing his wood shot that kind of thing I did it at left-field brewery a couple days ago and a vlog but whenever I can find a really good reason or I'm shooting and I can work that in i 100% try to make that effort so that kind of leads into my first point my first point is transitions are more than just fancy edits and ways to make your footage look better absolutely that's what they do but to get the most out of your transitions and to make them feel intentional and to make them feel like you meant to do it and they're perfectly suited for each other you got to think ahead of time you got to shoot to edit I've talked about this before you got to plan those shots you got to shoot the transitional Clips ahead of time so when you bring those into post and actually start editing them and adding the transitions into those two Clips


  you're going to get a slug ah you're going to get such a better results because you plan for that transition it's not just finding two clips that happen to work together and you're like oh sick and I worked out and sometimes that happens but if it worked out because you shot certain clips to do certain transitions with it's going to be that so so much better okay now before we get into the actual tutorial of how these transitions work it's important to talk about screen direction and movement because there's ways transition clips without actually adding and edit into them so when we're going to do masking or frame blocking we have to actually go into that clip and mask out Clips underneath and then move things around and actually edit footage but before we even get into the editing like the meat of it you can still get great transitions just by matching Clips together or matching screen directions so if there's a car moving to the right the next clip might be someone running to the right and the next clip after that might be something else moving to the right but if you transition those Clips properly between each other and you carry out that screen direction where all the movement is going one way those are still transitions you're still keeping in mind you're still editing with that intentionality so that when people watch your films and your videos it feels cohesive feels like there was thought put into it they might not subconsciously pick up on it some people might but if they don't it's still it's an easier watch it's a better watch so not all transitions are fancy camera moves or fancy editing techniques sometimes it's just putting the thought into how you're going to piece those


 Clips together so screen direction and the way it Clips move in and out of each other using intentional shots that as every bit important as actually learning how to edit in transitions in post the two things need to work together to get the best result essentially it's one thing so now that's out of the way let's move on so what masking and frame blocking transitions are really good at is making an edit feel really just seamless instead of just one clip whipping into the next clip which starts with the whipping of being able to mask that out just makes it a lot more like whoa just flows real nice think of it as just like a nice flow opposed to some turbulence in that flow we want to remove all the turbulence and sometimes adding these types of transitions just smooth it out for a much less bumpy viewing experience no seat belt required now if you're going to do the frame block and you have to shoot something that's in front of the frame so that you can actually mask it out you got to keep that in mind so it could be someone walking by it could be an object that is just blocking where the term comes from the frame and you pan through it so that it is essentially the divider that across the frame that's the that's the focus point that's the anchor that's what we're going to use to blend away sl


So we see the clip beneath so when you're shooting you got to keep that in mind you got to look for those things maybe it's a telephone pole maybe it's a car that drives by the frame and completely blocks the frame like that but you want something that goes right in front but you can mask away that's the kind of thing you want to look for when you're shooting so if we're in my office for example right now and we just want to hand hold a clip just for explanation or purposes and let's say we start the clip moving to the right and then we film another clip if we just put those two clips together you can see how it doesn't seamlessly it's just not it works but it's whatever it's forgettable you're not going to think anything about it but if we frame block and we move the camera in front of something and in the next clip we continue that transitional movement but now we're going to mask away that first clip to review what's underneath look how much better that clip looks now as a seamless just cohesive saying that a lot today but it's the best way to describe it but look how much better that looks it looks so much better it's visually appealing it makes the Edit flow you don't feel like anything is broken or skipped nothing like that it just works so let's get into how we can do that in Premiere Pro ok so let's jump into Premiere this is how we're going to do this we're going to be using this clip and it's going to mask into this clip now how do we do that well by creating a mask but this kind of goes back to what I was saying originally when you need to make sure that you shoot these types of Clips so that they work for you when you're editing versus just trying to find something through stuff that you've already shot or old clips if you go and shoot intentionally to make this transition it's going to be way way easier and what I mean by that is this clip here is what I shot at the brewery I went from the left side of this control panel panned to the right side and made sure that it passed in front of the frame completely so that I could mask out this section and put a different clip underneath okay and that's what we've done when you see the clip here alright so how do we do that pretty easy you're going to go to the first frame where you see that right side start to peak through which is right there and you're going to cut right there zoom in on this so that is the first frame we're going to do so make sure that your screen size down here is set to about 75 or 70 a little bit of room to work and then come over to effect controls and select to be free draw Bezier what you're going to do is you're going to make a little shape around that little sliver of life that we see there boom just like that then come over back over here click invert and then we're going to toggle mask path feather opacity and expansion now essentially what those do if you keep your eyes on the right side there and we move mask expansion see how it makes it a little bit bigger 


  So we can kind of play with that expand that a little bit more we can feather those edges so it's not so harsh you can expand it ever so slightly more so that it's nice and covered and just like that that is our first frame of this section masked out now what we need to do is come over at this point and select this little play button that says track selected mask forward one frame and we're going to do this frame by frame by frame until the whole clip is masked out alright so with that being done make sure this is selected make sure your mask is selected up here and then what I like to do is just go back and frame to make sure I can see it and then go forward and I like to click so I can get that mask back now you're just going to drag it back up and you're going to make a new shape you can do that by adding a new pen point here it's just your cursor right here if you select this it gives you another pen tool and we can click another point and drag that back up and drag this back down I like to just pull this back a little bit just so I can see where that edge is to make sure it lines up nice same thing with the top corner make sure that lines up nice boom happy with that and we're going to track forward one frame go back down here to the timeline make sure that it's selected we can go back to frame to see go forward one more frame come up actually click on the window which selects the mask and then we can drag that over so since we're just adjusting this dragging this out these little handlebars here tweak the the roundness and stuff like that so if you've got a shape that's curvy or you're masking something out that isn't just a straight line you can use the pen tool with a really kind of curve and get jagged lines and stuff like that   


so it's really really helpful but again we're just going to peel this back make sure that everything is selected nice and meat and same thing I'm happy with that and we can track forward one more frame go back make sure that looks good forward again come back up here click on the mask and drag that out to continue masking at this clip make sure that corner is not cutting in we want that whole frame to be selected so we're good and we mask forward one frame make sure it looks good by checking go back select your mask and drag that out to continue masking okay and you do this basically for the entire thing until it's done now if you did make any mistakes you can always come back and you can look like see right down in here there's a little bit of a hole there I can select this make sure mask is selected over here and you can just adjust that you can bring it a little bit back you can bring a little bit forward to make sure it's good and then you can check that out again then you can frame by frame to make sure it looks good and once you're happy with that you can select and you can change that mask at any time so once you've done the whole mold thing it should look something like this let's disable that once you've done the whole thing every frame should be masked out so that the whole clip  


   just goes black and then at the very end your mask covers the entire frame so when you enable the clip underneath it essentially you've got a beautiful new frame blocks transition alright another really easy transition to do and this one doesn't take a lot of work is just panning into something that is the same color and panning out of something that's the same color so a lot of the times I'll do this with black I'll pan into someone's shirt and then all I have to do for the next clip is start somewhere that's black and pan away so when you add those two Clips together it looks like this weird transition just happened and you think to yourself well how did that that's cool you don't necessarily pick up on it but it's just another really really cool way of seamlessly blending Clips together the same thing is done with you guys see a lot of probably on YouTube when someone puts their hand on the lens I'm going to come away in a different area that's the same thing all you're going to do is put your hand up to the lens and then you're going to go wherever you're going to go you put your hand back on the lens to start the clip take it off and when you edit those two clips together so it just looks like you put your hand up to the camera and you're suddenly in a new place the same thing goes for the whip transitions if you just hold the camera and you whip around to your left and then wherever you're going you get to your spot you begin that clip by continuing a whip to the left and then you cut those two frames together and post the same thing goes for when I do the transitions where I move the camera down and I start the clip doing the same thing I prefer that one because I can add a little body motion to it I feel like it looks more realistic like


 I just actually landed in some clip downwards motion combined with my acting skills they're not very good but whatever it works it just adds for a more enjoyable experience when you're watching it's just one of those things that you're like oh that was cool it kind of looks like this you can see how my body reacting to the transition kind of introduces a new dynamic that goes beyond just that of an edit now it's kind of like I was physically affected by the transition that happened in post and you guys know what I mean it's like you you went one step further and instead of just visually watching something happened that transition actually affected what was on the screen that's why I prefer to do it that way so that's it for me today guys


 I hope you guys enjoyed this tutorial and got something out of it there's a lot of really good information in this video a lot of stuff that I'm really proud of it's a lot of stuff that I feel is important that you guys learn it's not stuff that I invented I did not create frame blocking or masking that that is not it's an old technique that's been used by so many filmmakers and so many filmmakers and content creators teach it and use it because it's awesome so you should be doing it too because it'll help improve your films 100% if you use it the right way so hopefully you get something out of this insight if you did hit that like button show me some love hit that subscribe button if you want to see more I upload videos several times a week trying to ramp up the united trying to ramp up the amount of videos that i'm posting for you guys so you guys have a good stream of content so hit that subscribe button if you want to see more hit that bell if you want to be notified when I upload a video and other than that I will see you guys hang on let's rewind I did that wrong and and I will see you guys in the next video thank you for watching still missing my hat will use my sweater


Read More

Wednesday, March 23, 2022

Ship Transition Tutorial

March 23, 2022 0

 How To Make Trending Ship Transition


                            Ship Transition


Introduction:

Hello and welcome to Rc edits in this two part tutorial we're going to look at 8 awesome and easy transitions, that you can make in a matter of seconds even though you could make a preset for some of them these transitions, are so simple that they don't require a preset at least in my opinion this two-part tutorial is a collaboration.


Clips

hey everyone glad to be here you can find the first four transitions , in this video and the other four in the video that is linked at the end of this one anyway it's time to start some editing after the quick message from our sponsor vdivo.net vdfo is a great source for free and premium stock footage, for example all the clips used in this tutorial video are coming from vdivo and besides the more than 100 000 video clips they've also got a big collection of music and sound effects be sure to check them out and use the discount code storytime20 to claim a 20 discount on one of their premium plans, the links can be found in the video description ok now it's time to jump over to premiere and look at 


Transition:

The first transition the first one is a simple zoom transition, and i've already got two clips ready on the timeline to show you how to do this one the first step here is creating an adjustment layer, you can do this in the project panel click on the new icon and then select adjustment layer and then accept the default settings and click ok you can now drag this adjustment layer over to the timeline and place this on top of the two clips then shorten the length of the adjustment layer until it's somewhat equal on both sides.


Effects:

 Next we're going to add an effect in the effects panel we're going to search for the transform, effect you'll find this one under video effects distort i'm going to apply this effect to the adjustment layer, and then put the playhead right between the two clips and you can also zoom in to be sure that it's right in the middle now.


Keyframes:

 i'm going to move over to the effects control panel and i'm going to look at scale properties of the transform effect first i'm going to enable keyframes, by clicking on the stopwatch icon here then i'm going to move that first keyframe, with value 100 a couple of frames back and then create another keyframe with value 100 and move that one a bit forward the playhead is still in the middle between the two clips and that's where we're going to create a new keyframe with value 300 and now as you can see the zoom effect.


Conclusion:

now you've got this awesome glitch transition, thanks again jill and that indeed was awesome and easy and that also concludes this first part of the eight easy transitions let me know in the comments if you would like to see another transition collaboration, video with storytime and premiere basics and now you can click here to see the other four transitions, that's it for this one thanks a lot for watching and i hope you have a wonderful  day you 


Read More

Monday, March 21, 2022

Advanced Transition Preset Download

March 21, 2022 0


                         Advanced Transition 


In this tutorial i'm going to show you how to make a smooth sliding transition inside, of Alight Motion  my name is Rc and i do weekly Alight Motion and filmmaking tutorials so make sure to subscribe and hit the bell so you don't miss out on future videos.


   I got two clips on the timeline and i really want to transition, from this clip right here and into the next clip with it sliding this way so the first thing we need to do is to drag this first clip that we are transitioning, from up to video track number two and then you can select how long you want the transition to be. 

 so i really want to start around here i think and then i can drag the second clip that we are going to transition, to under the first clip so now we have these two clips stacked together and then i'm going to select the eraser tool by hitting c on my keyboard and i'm going to make a cut right here at the first clip and i'm also going to make a second cut at the second clip .

So now we have sectioned off these two clips right here then we can go and select the first clip that we are transitioning, from and we're going to work inside of effect controls so i'm going to put my playhead at the beginning of the clip and i'm going to make a keyframe so i'm going to make a keyframe for position and i'm going to go forward in the clip and make another keyframe 

 so i'm just going to drag this to the side and i just want this clip to be slightly off to the side right here just so we don't see it anymore then i'm going to drag this last keyframe, all the way to the end of the clip so now it will look something, like that this looks a little bit weird so we are going to make this other clip slide at the same speed at the first clip so first we need to hide this first clip and we can hide this video track number two by clicking the toggle track output and then it disappears then we can select the second clip.

   we're going to make some keyframes on this clip as well so let's move the playhead to the beginning of the clip and then we're going to toggle a keyframe and we're just going to drag this all the way to the other side so we are slightly off screen then i'm going to move my playhead, to almost the end of the clip again and i'm going to drag this until we have it in the same place that it should be and then i want to drag this last keyframe up there as well i'm also going to add some blur but let's see how it looks so now we just have this simple little slide transition but i'm going to add some blur so the first thing we need to do is to go down here and select new adjustment layer, 

 when you get this box here you just click ok and inside of the project bin we have this adjustment layer so i'm just going to drag this on top of both of the clips and i'm just going to trim it so it fits on the transition right here and then we're going to search for effect right here called the directional blur and you'll find that in the video effects blur and sharpen folder and you have the directional burr right here so let's drag that on top of our adjustment layer and then i'm going to go to the beginning of the clip right here.

i'm going to set the values in the directional, blur to 90 degrees so that is horizontal and then we can increase the blur and this is something you can decide how much blur or not you want but i think i'm going to go around 30 and if you play this back right now this is how it looks but if this is too slow for you i will show you how you can make this go faster so to make this go faster we can simply, select all of the clips that are in this slide transition section and we can right click and nest it so click the nest button right there and click ok and then we can go over here and use the rate stretch tool or you can just click r on your keyboard and this will allow you to adjust how fast this section of the transition 

 So let's say i want to make this double as fast i could just drag this and then we can put this first clip on there and make sure we delete this and when we play this back right now we got a faster transition on the screen right now we got another video for you to watch next and if you haven't yet make sure to subscribe,and hit the bell thank you so much for watching create an inspire and i will see you in the next video 


Read More

Wednesday, March 16, 2022

Transition Pack Download

March 16, 2022 0


                      Transition Preset Pack


Introduction

      let's face it if you are films to stand out then they need the sort of style and transitions, that catches people's attention in this video you're going to get my top ten Alight Motion transitions, that include Pam tilt zoom chromatic aberration and shake transitions.

 my goal is to help you set not only your editing apart but the look of your films,also so if you want to follow along on that journey you have to see our color grading, crash course for Alight Motion or our cinema grade plugin for Alight Motion.


Color Grading

 That gets you direct on-screen color grading x-ray, Auto match support easy shot matching real-time previews of Luntz and you can even get the same look of your favorite film I'll have a link for those in the description.


Preset Pack

Alright let's get to the transitions first you need to download the presets so go ahead and click on the link in the description, so once the project is downloaded you can open a project you're currently working.


Transition

Alight Motion transitions can even help you create the illusion of a continuous shot and they can even trick our mind into thinking it's an actual camera movement thanks to the motion blur now it's really cool about all of these transitions.


Zoom Transition

transitions the zoom is always centered but you can zoom in any direction for a better result for example here on the zoom out the first shot has the models face at the center but in the second shot it's a little towards the top and to the left making the transition. 


Conclusion

set your films apart for more videos like this click the subscribe button and then the bell to be notified of our next one I'll see you in the next video let's make the grade 


Read More

Top 3 Cc Pack Download

March 16, 2022 0

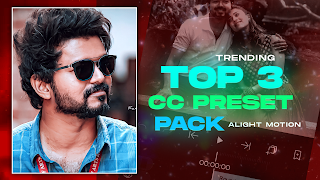
 TOP 3 Cc Presets Pack


                         Top 3 Cc Presets 

hey guys jill here for premiere basics a weekly series where we teach you all the ins and outs of adobe premiere pro, last week adobe released a brand new feature that lets you color grade your footage with just one click of a button currently, it is only available within the beta version of premiere pro 


  so first let's open up the adobe creative cloud app and move to the beta apps menu then download the beta version of premiere after it's installed open up the beta app and you'll notice that the import menu is already different,  but that's something that we've talked about in a previous video which you can see by clicking the link in the top right corner now 


   i'm going to import some, footage which will be some log footage that we've shot and some stock clips from story blocks that already have a decent color grade we're now going to color grade these clips to get some nice looking colors to start color grading move to the window menu and select the lumetri color panel if you have never color graded before let me give you a quick introduction within the lumetri panel, we have multiple tabs the first one is the basic correction tab from here we can make as the name indicates basic adjustments to our contrast and exposure but also the temperature of your shot.

  next is the creative tab from here you can add luts which you can technically, also do in the basic correction tab but if you apply it here you can still adjust stuff later on in the basic corrections, in the creative tab you can also add sharpness vibrance and saturation next up is the curved step from here you can use the curves to control exposure and colors but in a more advanced way you can also play around with the hue saturation, and luma controls to control specific colors on your shot next is the color wheels and match tab and here you can add specific colors to either the shadows mid-tones or highlights, next is the hsl secondary tab which you can use to make selections of specific colors which is an ideal way to create better skin tones for example and lastly we have the vignette tab which is basically, to create a vignette obviously but you have clicked on this video to see the brand new one-click color grade feature in premiere so let's now wait any longer. 


 when you go back to the basic correction, step you will see a new button which says auto tone now if you click this premiere will apply intelligent auto corrections to your footage and this is all done with the sliders of the basic correction step which means that afterwards you can still have full control over it and change anything if needed so why is this so useful well for beginner video editors this is a fast and easy way to apply a quick and nice looking color grade to your footage as a start you can then use for example the color wheels.

 and results actually look pretty damn great so i can't wait for adobe to release it officially for everyone to use it i hope you enjoyed this video and learned something new and if so make sure to hit the like button turn on post notifications and of course subscribe to the channel and feel free to share this video with your friends or on your socials i'll see you again next week with a new tutorial and as always stay creative.


Read More